- Print
- DarkLight
Setting and updating milestones
Setting interim milestones are a simple and effective way to track the progress of any project over time. We highly recommend setting interim milestones for every project executed on the InsightGig platform, be it a short project lasting one week or a long one lasting several weeks. Milestones ensure that you and your client are always on the same page on the progress of a project, and any delay in meeting a milestone can be addressed quickly before the point of no return.
Setting milestones
The option to set up milestones will be available on the project collaboration page once the Client completes the initial payment (if applicable) as agreed upon by both parties at the proposal approval stage. Once the payment is completed (if applicable), InsightGig Admin will open out the milestone feature on the project collaboration page. On the image below, you can see the activated Milestones section. You are now ready to add milestones! Even if you forget to add milestones, you can expect a reminder email from us! :)
.png)
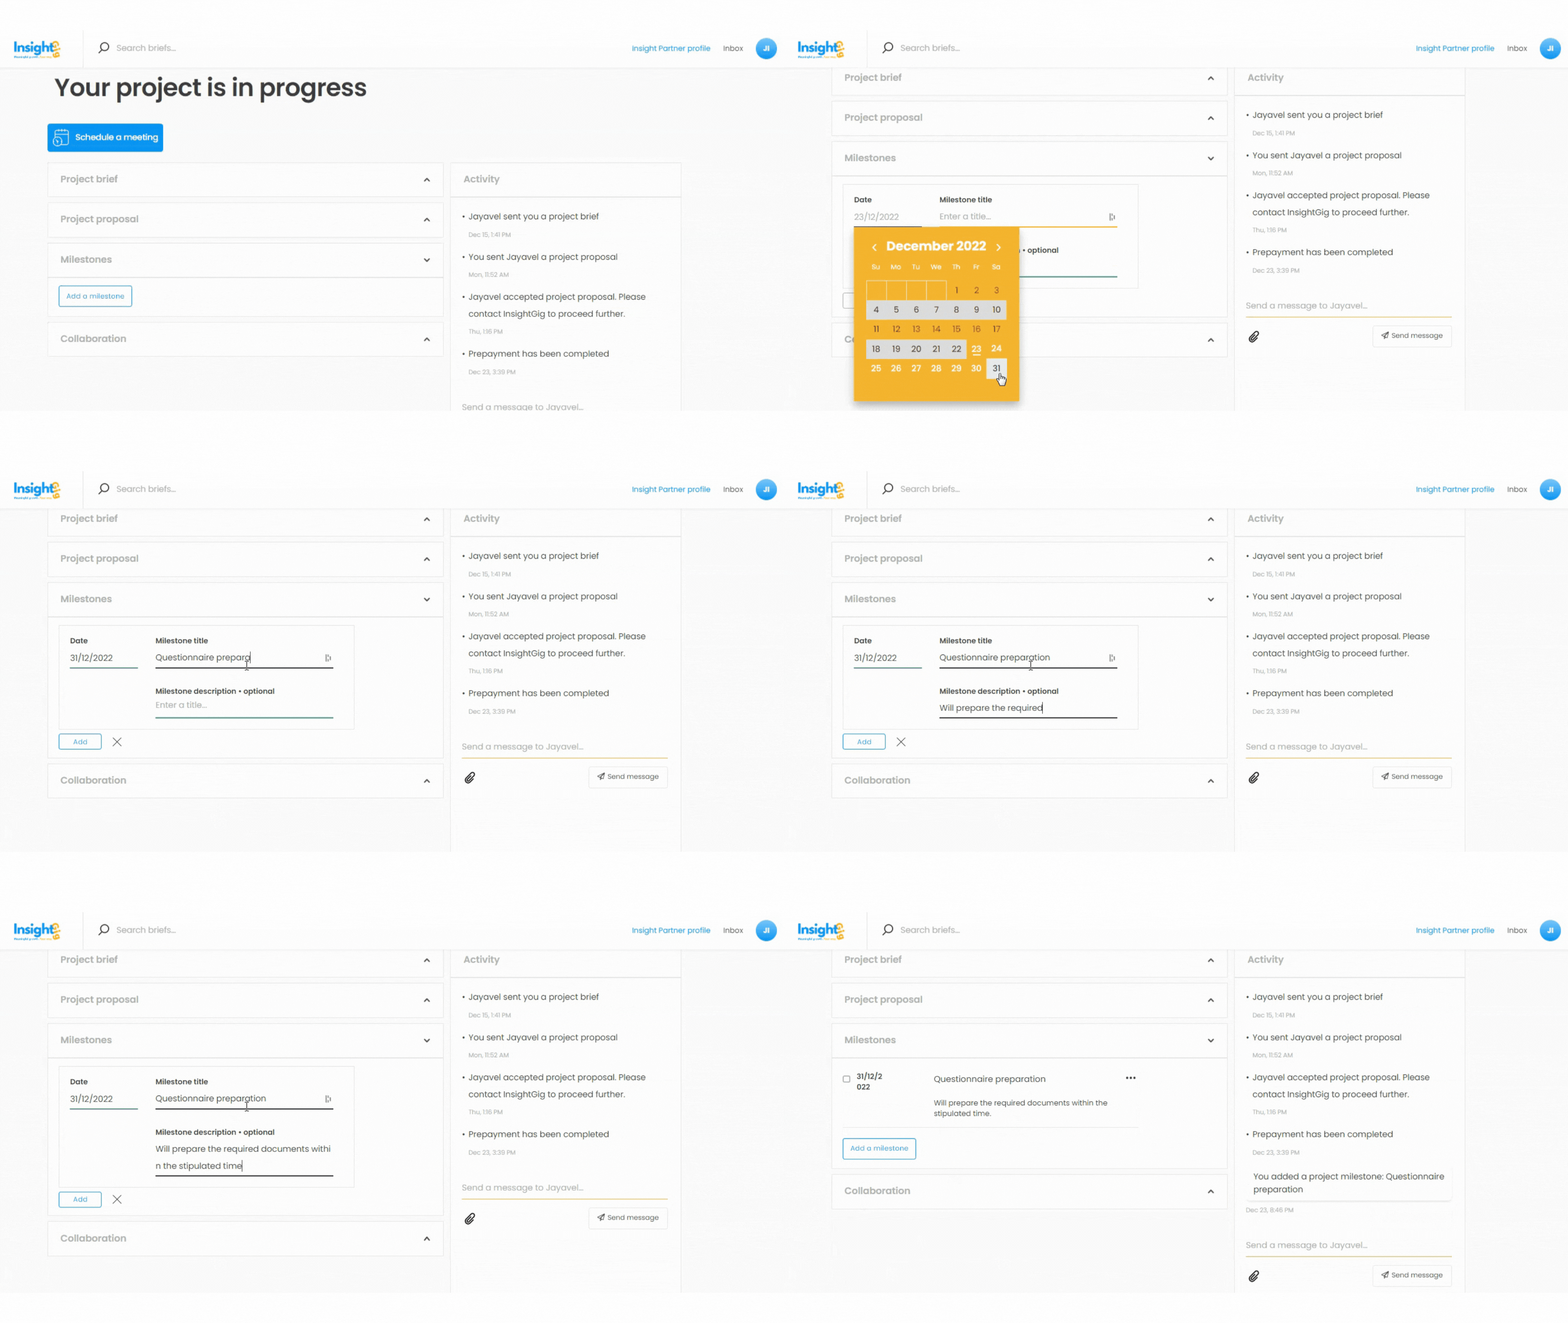
To create a milestone, you need to click Add a milestone and add the following information for the milestone on the project collaboration platform.
- The date on which the milestone will become due.
- A title for the milestone. For example, it could be 'Data cleaning'.
- A short description of the milestone. For example, it could be 'Clean the data provided by the client, and make it ready for analysis.'

Once you add a milestone, you can view it on the project collaboration page and the client will be notified by email. You will also see a message on the Chat section, indicating that a milestone has been added.
.png)
Milestone are automatically sorted chronologically. You can add them in any order and watch them get sorted chronologically based on their respective due date!
Editing and deleting milestones
To edit a milestone created earlier, expand the three-dot menu as shown in the image below and click on Edit milestone. If you would like to delete a milestone, select Delete milestone. Each of these actions will trigger email notifications to the client.
.gif)
Marking milestones complete
When a milestone is achieved, you can mark it as Complete and move to the next task. To do so, check the box next to its title. The status will be updated on the chat, and the client will be notified by email. Congrats on completing a milestone!
.png)

