- Print
- DarkLight
Article summary
Did you find this summary helpful?
Thank you for your feedback!
In this article, we will explain how you can create a Client account on the InsightGig platform. It can be done in two ways.
- Using your personal or organizational email address
- Using the Single Sign-On (SSO) option with an email ID from Google
Creating an account with your Email ID
To create a Client account using your email address: -
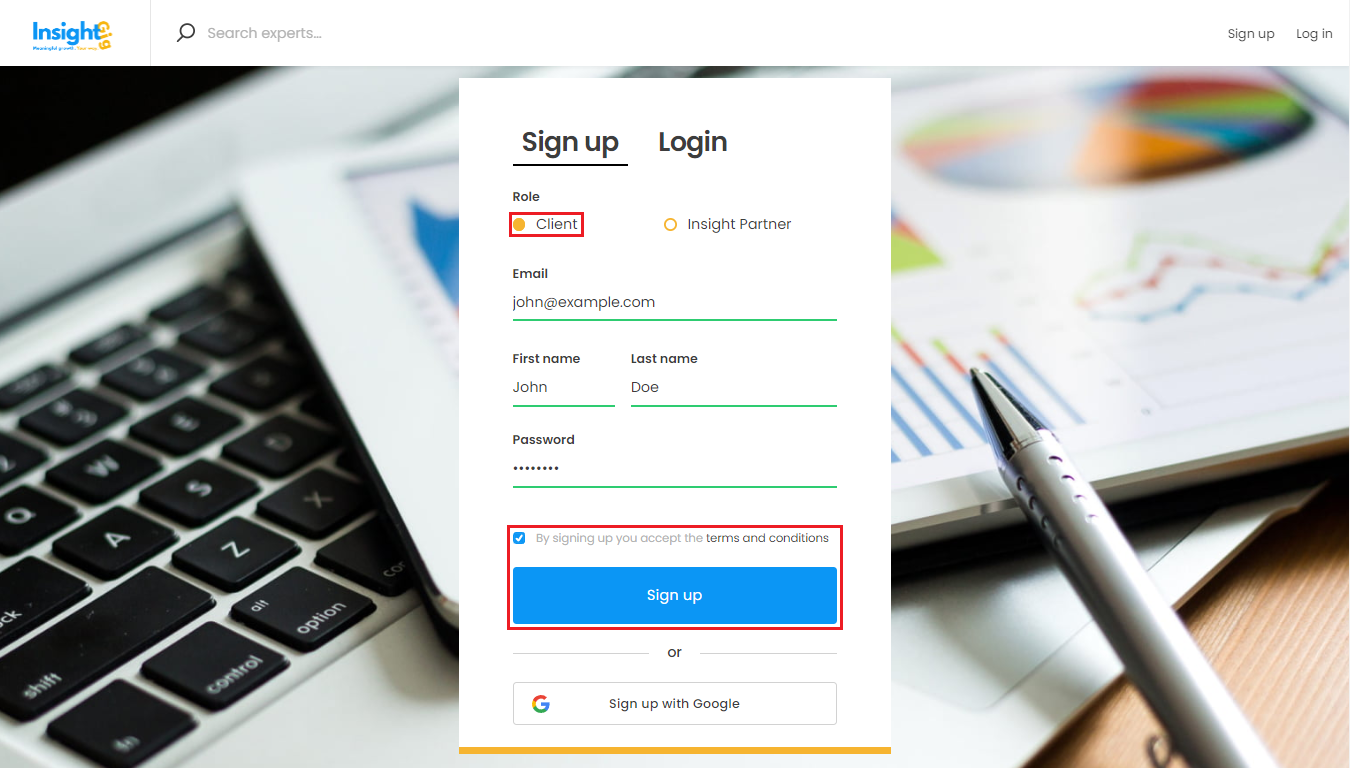
- Visit the InsightGig homepage here and click on 'Sign up' at the top right of the screen. (For a direct link, click here)
- Select the Client role and fill in the rest of the details.
- Review and accept the Terms and Conditions and click on Sign up.
- You will move to the next screen with a prompt to verify your email.
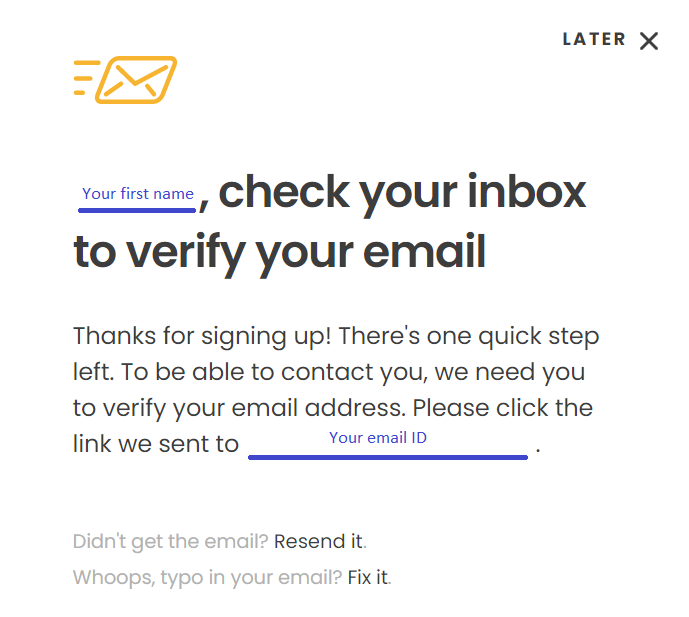
- Follow the instructions on the verification email and activate your account.
- After email verification, you would see a screen like this.

- Please wait for your account to be activated by InsightGig (you will also receive an email indicating so). This may take up to 2 working days. Till then, the application would not be active.
- Post activation, the message with the orange band would disappear and you would be able to use the platform. You would receive an email once your account is activated by InsightGig. Hooray!
Creating an account with Google Email ID
If you have a Google email ID (Gmail or Google Workspace), you can sign up with it using the Sign up with Google option. Using this option, you can do away with needing to remember yet another password. Further, you can access the InsightGig platform easily if you have already signed into Google with the same email ID on the browser.
- Visit the InsightGig homepage here and click on 'Sign up' at the top right of the screen. (For a direct link, click here)
- Click on Sign up with Google.
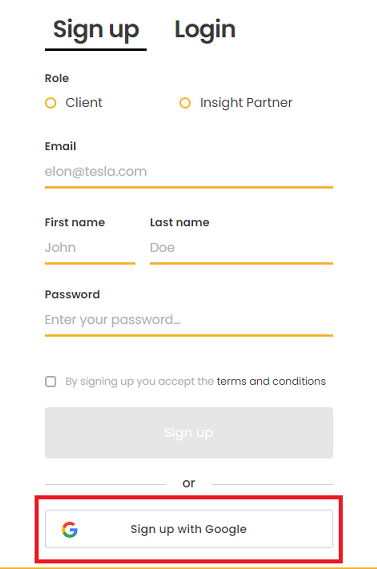
- Follow the instructions on screen to sign in to InsightGig using your Google credentials.

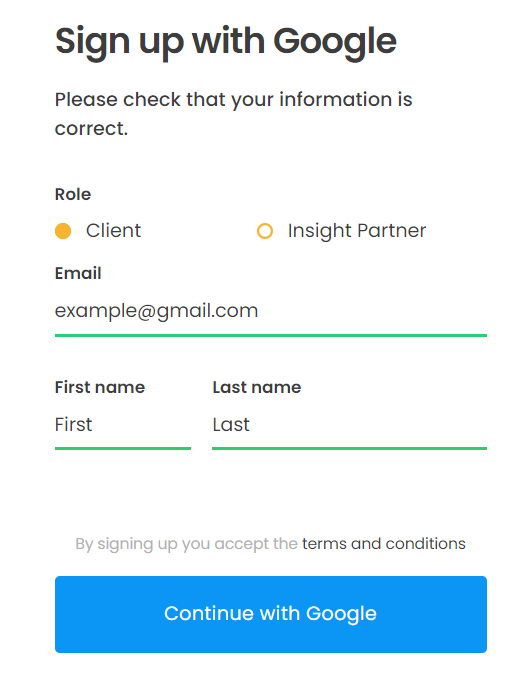
- After signing in with Google credentials, you will be prompted to check the information. The Email, First Name, and Last Name fields would be prefilled while the role would have to be chosen. On choosing role, the Continue with Google button will activate.
- After email verification, you would see a screen like this.

- Follow the instructions on the verification email and activate your account.
- After verification, you would see a screen like this.

- Please wait for your account to be activated by InsightGig (you will also receive an email indicating so). This may take up to 2 working days. Till then, the application would not be active.
- Post activation, the message with the orange band would disappear and you would be able to use the platform. You would receive an email once your account is activated by InsightGig. Hooray!
Was this article helpful?
